
So you want to barbecue with charcoal.
And it is supposed to be so hard.
You want to enjoy warm evenings gathered around the grill with family and friends.
The sizzle of barbecuing meat punctuated by laughter. With the smell of open flame grilling in the air…
Will this be how it is? Or will reality be you running around like a headless chicken. Serving grilled chicken, that is desperately overcooked?
Well, guess what?
It does not have to play out this.
And, no, you don’t have to be that stressed out host. Or serve meat this is an embarrassment.
Because, in this bbq guide, we are going to arm you with everything you need, to know how to barbecue. Like a pro.
So grillmaster to be, let’s dive in!
How to Barbecue like Pro, Even If You Are a Newbie
Okay folks, here is the good news.
Open flame grilling with charcoal is often made out to be more difficult than it really is.
With the right info and the right equipment, all you really have to do is fire up that grill and hone your skills.
In this barbecue guide, we are going to give you all the info you need to get started.
Before we get into the steps of how to grill for beginners, let’s go through what equipment you will need to grill like the best of them.
Bbq Essentials
- A great grill
- A chimney starter
- Tongs
- A grilling fork
- Barbecue gloves
- Good charcoal
Having a good grill that will help you to barbecue with ease is essential. Barbecues are designated chill time with family and friends.
The last thing you want to be doing is struggling around with the grill.
Having gloves, a chimney starter, and the right grilling tools are also vital to making your barbecuing easy, relaxing, and hassle-free.
Now that you have this checklist of essential equipment – let’s jump into how to barbecue with charcoal!
Step 1: Select Great Charcoal
The very first step to killer open flame grilling is to select great charcoal. BBQ experts (such as Jamie Oliver’s pals) largely agree that hardwood lump charcoal is the best.
Made from actual trees, lump wood charcoal will not impart unwanted odors onto the food.
Briquette charcoal is made from a varying assortment of combustible material. Which is why it is considered to be inferior to lump wood charcoal.
Step 2: Calculate the Cook Time Required for Your Cut of Meat
The next vital step in how to grill meat to perfection is to calculate the cook time. The exact cook time required will depend on two things:
- Your cut of meat
What type of meat it is and how thick, or what size is it? - The cook you are aiming for on the cut
Are you aiming for rare, medium rare, medium, or well done?
Meats such as steak are quick cookers, especially if they are thin. Whole chickens and other large cuts such as legs and ribs, will take much longer to cook through.
At this point, you must also decide whether you need direct heat or indirect heat for grilling your meat.
Direct heat is the term used for spreading and cooking directly over, a bed of coals. It has high heat.
Indirect heat is what you get when you place your coals to the side of the grill, and cook the food at a small distance from them. Which results in low heat cooking.
Direct heat is suited for:
- Steak
- Burger patties
- Lamb chops
- Sausages
Indirect heat is suited for:
- Most larger/thicker cuts of meat
- Chicken
- Whole chicken
- Ribs
Step 3: Assemble Everything You Will Need
Another key component of how to bbq like a seasoned pro is station preparation. This may sound a little chef-y for plain ‘ol bbq – but it is a step that pro pitmasters swear by.
To prep your bbq station like the best of them, you will need the following:
- That great charcoal we mentioned earlier
- All the food that is going to be cooked on the barbecue (your chosen meat and grilled sides)
- Salt and pepper
- Any other seasonings you choose to use
- Grilling tools such as tongs, fork, and gloves
- Serving dishes for when the meat is done
It is also a good idea to set the table before firing up the bbq. This way, when the food comes off the grill, it can be served right away.
Without you or anybody else rushing around for plates and knives.
This ensures that you can grill, chat, and share a drink, right up to the time of eating.
Having everything you need, on hand and ready to go, with the table set is something you won’t find in every barbecue guide. But, it is the secret to calm and confident grilling.
The kind that makes you look like a master.
Versus a stressed host who is trying to locate the salt!
Step 4: Measure out and Light Your Charcoal
Now you are ready to fire up that grill.
The first thing to do is to measure out how much charcoal you need.
How to Measure out Your Charcoal
There are three factors that influence how much coal must go into that bbq. These are:
- The quantity of meat/food you will be grilling
- The amount of cooking time required
- The level of heat you want
Using too much charcoal is better than ending up with too little. So err on the generous side when measuring.
If you know what range of heat you are going for, then you can measure according to that:
- 1 full starter chimney = high heat (450°F to 550°F)
- 1/2 to 3/4 full starter chimney = medium heat (350°F to 450°F)
- 1/4 full starter chimney = low heat (250°F to 350°F)
A good sized starter chimney holds roughly 5 quarts of charcoal.
How to Light Your Charcoal
Once you know how much charcoal to use, it is time to light it. Below are simple steps, however for an in-depth guide explaining how to light charcoal with or without lighter fluid go to our article here.
The best way to light charcoal is to use a chimney starter. Chimney starters allow for easy lighting. They also ensure that all the charcoal pieces burn evenly.
Most importantly, you do not need to use lighter fluid with chimney starters. Which can give unpleasant flavors to the food that you are grilling.
To light your coals using a chimney starter, do the following:
- Place the chimney starter in your grill
- Place a good amount of crumpled paper underneath the chimney
- Fill the chimney with charcoal
- Light the paper in various places
- After 15-20 minutes the charcoal should be burned down, with an ashy gray coating
Step 5: Spread Your Charcoal
Time to spread that charcoal!
All you have to do here is either lay it out for direct heat or bank the charcoal to the side for indirect cooking.
If you are doing direct heat grilling, try spread the coals out to a 1-2 inch radius of your grid area. This will ensure even cooking, even for the meat at the edge of your grid.
Step 6: Clean Your Grill
Before we get down to getting that meat on the grill, there is one last task you need to do. Clean your grill. Below are some simple steps on how to clean your grill, however, for a more in depth guide on how to clean your grills go here for charcoal and here for gas.
Place the grid over your bed of coals for a few minutes. Then armed with a wire brush, brush the grid down lightly.
This will remove any dirt or old grease. The heat of the coals will also sterilize the grid.
Warning: Be careful not to overheat the grid while you are cleaning it, as this can be damaging.
Now take your clean grid, and oil it. An easy way to do this is to dip a piece of kitchen paper into a little cooking oil. Then rub the grill down and you are ready to go.
Step 7: Place Your Meat onto the Grill
You are now at the most exciting part of this bbq guide.
Time to get some meat on that grill!
The first thing you need to do is to check the temperature of the coals. Most good barbecues have inbuilt thermometers for this.
You can also buy freestanding ones separately if your grill does not have a thermometer.
Here is a quick guide to coal temperatures. For our ultimate guide and advice on temperatures to use with various meats and grill types check out the full article here.
Bbq Temperature Guide
High: 450° F to 500° F
Medium high: 400° F to 450° F
Medium: 350° F to 400° F
Medium low: 300° F to 350° F
Low: 250° F to 300° F
Once you have checked that your bbq temperature is where is it meant to be, you can go ahead and get the meat on.
All you gotta do is place your cuts onto the barbecue.
And of course, take a step back and savor the feeling of open flame grilling.
Step 8: Control the Bbq Temperature
After you have placed your meat on the grid, it is vital that you watch and control your bbq temperature.
How to Check the Temperature of Your Bbq
The easiest way to keep an eagle eye on your bbq temp is to use a grilling thermometer. Some grills are fitted with inbuilt thermometers.
If your grill does not have one, there are many great models of leave-in probe bbq thermometers that you can check out.
You can also place your hand over the coals to ‘guestimate’ the temperature.
How to Control the Temperature of Your Bbq
There are three ways you can control the temperature of your barbecue.
Spread or Pile the Coals:
If your coals are too hot, you can reduce the heat by spreading them out further. Piling the coals will create heightened heat above them.
Adjust Air Vents:
Adjusting the air vents on your charcoal grill is the ideal way to control temperature.
If you open the lower and upper vents on your grill this will increase airflow, and make the coals burn hotter. This will cause them to burn out quicker.
If you close all of the air vents, this will cause the temperature to drop. If the vents are closed for a while, the coals may smother and die.
If you have not already, play around with your air vents to get a feel for how they can be used to control temps like a boss.
Add Charcoal:
If you run into the event that you need more heat, and you will not be able to get it out of your coals, then it is time to add extra charcoal.
To do this, place more charcoal evenly over your existing bed of coals.
Tip: Do this before the temperature plummets completely, as it takes some time for the new coals to emit heat.
Step 9: Measure the Temperature of the Meat
In an interview with Food & Wine, competition level griller Ruben Renteria revealed that a meat thermometer is the secret to successful grilling, every time.
And we could not agree.
With a meat thermometer, you are guaranteed an exact cook on your meat.
To measure the temperature of your meat successfully, you will need to insert the thermometer a little before your meat is done.
If you insert the thermometer too late, you will end up overcooking the meat.
So it is of the utmost importance to measure the internal temp of your meat early. So that you can to take it off the grill at precisely the right time.
Most meats will continue to cook after you take them off of the barbecue. So, to nail the cook, remove the meat 5-10 degrees before it reaches the target temp.
If you are thinking – but hold on, how do I know what temperature my meat should be? – don’t stress. We have you 100% covered with our ultimate temperature guide. For everything.
Simply refer to the guide to find out what temp to cook your meat to.
Step 10: Serve
Well howdy, grill master! You are ready to serve up and tuck into your seared and succulent bbq fair.
We are pretty sure you know exactly how to execute this step.
Final Word
Guess what? You now know how to barbecue. Your open flame grilling will only improve with time. But for now, you are ready to fire up that bbq!
We wish you many nights and weekends of friends and family gathered around the grill. Enjoying great company, and, of course, great food.
And if you are already trying to think up a great bbq menu, and want some inspo, head on over to our post on backyard bbq menu ideas.
Check out our Recent Posts
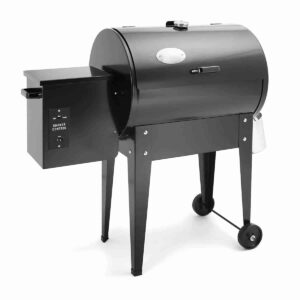
Z Grills Review
If you’re looking for a grill that will last, Z Grills is the way to go. Z grills are made of the best quality materials...
Read More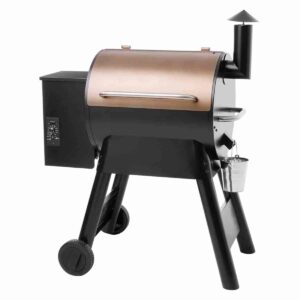
Pit Boss Pellet Grill Review
Pit Boss is one of many when it comes to manufacturers of wood pellet grills and smokers. If you have spent any amount of time...
Read More
10 Fun Benefits of Taking an Online Cooking Class
There’s never been a better time to take an online cooking class. With the continued popularity of online learning, there are more and more exciting...
Read More